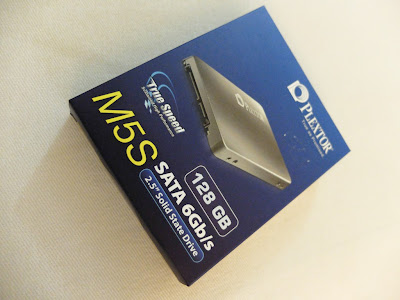
Plextor PX M5S 128GB SSD Review
I've been looking for ways to pimp up my beloved but aging white MacBook mid 2010 (identifier 7,1).
 I've been reading and hearing stories about how an SSD drive can seriously make a difference in the way your computer performs, and the geek inside me just can't help but to get one to try it out for myself! After thorough investigation on the various players, I choose Plextor due to the fact it is one of the best value for money, in terms of performance vs price.
Well, actually, I had a choice between Kingston V300 120GB SSD which is actually RM10 cheaper (as of date of publishing, the Plextor costs RM309 vs Kingston at RM299, a mere USD3 difference) but from a more popular company. Plextor seems like a relatively unheard of company, but both come with a three years warranty and both are Taiwanese.
On paper, it would seem like the Kingston had an edge on maximum write speed (450MB/s vs Plextor's 200MB/s), but after reading this review I was convinced to buy the Plextor. Also, my MacBook only supports SATA rev II which has a maximum throughput of 3Gbps (or 300MB/s) so I really can't make use for the full speed of either the Plextor or Kingston's read speed (advertised as 520MB/s vs 450MB/s respectively).
The main reason for my upgrade is to basically run the following faster:
1. Run my Lightroom and Photoshop apps
2. Launch Finder and other apps
3. Run my VMWare Windows 8 Virtual Machine
4. Boot up and shutdown
Of course, due to the price of the SSD, I had some trade offs, namely, all my photos had to be stored on a different drive which at the moment I use a USB enclosure for it. I would probably swap out my optical drive soon to replace it with my current HDD. Also, I needed to install "Trim Enabler", a freeware to automatically configure TRIM which helps increase the productivity of SSDs.
My former main HDD was the WD10JPVT (see review here). The random 4K transfers on the HDD fared at 0.52MB/s for read and 0.99MB/s for write. On the Plextor, that is 28MB/s for read and 62MB/s for write (see here). That's an insane amount of performance increase!
So how does it fare in real life? Not bad at all. I did a fresh install of Mac OS X 10.8.4 Mountain Lion on it in under 25 minutes. Booting up takes 17 seconds, from power button to login screen. Compared to when I was using my WD 1TB HDD, that took forever (didn't bother to count).
Apps generally launch in a couple of seconds. Lightroom launched in 7 seconds, from clicking on the app icon to fully loading the last set I was working on. My Lightroom Catalog Preview is about 4GB and the catalog itself about 676MB in my SSD so I'm really not complaining. It really shines once a photo is cached in the catalog preview and moving between photos on Lightroom is now fast with minimal loading time.
One of the greatest benefit I can see however, is using the SSD on my Windows 8 Virtual Machine. Everything simply launches quick. From starting the VM to the start screen in 20 seconds. Sounds like a lot, but when you compare it with the normal HDD, it's quick!
The unit I received had a firmware of 1.03, and I wanted to upgrade it to 1.04.
Basically, to do so I needed to:
- Burn the ISO firmware image to a CD. You can use Mac OS's Disk Utility to do that. (I tried with Titanium toast, but the ISO didn't boot)
- Restart your MacBook and hold the "C" key on your keyboard
- You will then be provided with a screen whether to update your SSD or not (I read from a forum that if you have used both your SATAs as HDDs, you need to remove one before proceeding)
In summary, I'm pretty pleased with the upgrade. Next time up, I'll be writing an article on how to pimp your old MacBook and give it a new leash of life. SSD is just part of the fun!


Comments
Post a Comment